Cheap Net Curtain Wire

FarmTek is the world's leading barn curtain manufacturer! Our curtains come with a small hem accommodating up to 0.922" OD swaged pipe. For a perfect curtain installation, we recommend our swaged curtain conduit. Medium and large hems are also available. Medium hems accommodate up to 1.66" OD pipe and large hems accommodate up to 1.90" OD pipe. We suggest large hems for roll-up curtain applications. Some important guidelines for ordering your barn curtain The selection of additional hem sizes for your curtain will affect your net width. Please use the following information and formula to insure you obtain your desired curtain net width. We recommend adding six inches to the width and two feet to the length of your opening for adequate curtain coverage. • Choose the appropriate barn curtain for your application. • Choose your barn curtain color. • Choose the barn curtain width you need. • Choose a hem size. If you require a second hem, simply add the suffix (mall), (edium) or (arge) to the stock number.
Please note the amount that each hem decreases the width of the curtain above. If you require a multiple pocket design or a custom size please contact FarmTek for assistance with your order. The requested URL can't be found. Find the Jo-Ann store
50 Day Weight Loss Challenge Tumblr gives you unique curtain hardware for
Discount Floor Tiles Gold Coast your home, gallery, studio and shop.
Funny Pool Cleaning Names a discreet aluminium track and brass curtain hooks, its the most modern way to hang your curtains. Unlike the more traditional curtain rail systems that use alot of plastic components to keep the manufacturing costs down, ALL of the curtain acessories and components that make up our own curtain system are made of metal.

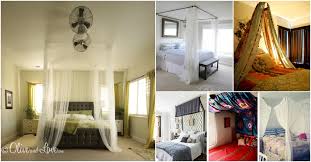
our curtain supplies and accessories the strongest on the market! You can even mount it upon the ceiling for creating divisions in rooms and halls, for privacy and exhibits. We also offer solutions for hanging nets.Today, I give you beautiful inspirations for DIY Canopy Beds.With the weather getting colder every day, you might think that you don't need more reasons not to get out of bed.While that is true, I can also assure you that making one of these DIY canopy beds should be added to your Must-Craft List.Really, they're wonderful and easy home decor projects.Hope you like these DIY canopy bed ideas!1. DowelMaking a DIY canopy isn't as difficult as you imagine.In fact, Camilla here shows us that you can make one using only wooden dowels, sheer fabric, and thumb tacks.What she did was insert the dowels through the fabric casing and then tacked everything to their bedroom ceiling. 26 of the Best Pinterest Crafts You've Ever Seen ... 40 Super Dorm Room Space Savers and Organizing Tricks ...

13 magnifique baldaquin bricolage...Don't you love the thought of being at a fancy poolside resort where you can sit in a cozy cabana and sip tropical cocktails all day? I've only ever really been in that situation once when we were on our honeymoon in Cancún, but I loved it. They had so many little secluded spots to hang out in so I could stuff my face with chips and guacamole with a little more privacy. I wanted to see if I could bring a little bit of that cabana feel to my backyard pergola with the help of some DIY outdoor curtains, and here's what I came up with: Supplies: -white fabric (I ended up using 20 yards total)*-grommet kit (you'll need 40 grommets)-fabric scissors-40 7/8" cup hooks-8 safety cup hooks-white chain (and strong wire or bolt cutters to cut the chain with)-waterproofing fabric spray (I used this one)-lead drapery weights (optional) *It's totally up to you what kind of fabric you want to use. Outdoor fabric can be expensive, so that's why I chose to use regular cotton fabric with a waterproofing spray.

You can use plain cotton fabric by the yard, bedsheets, or even drop cloths from home improvement stores! It just depends what dimensions you need and what the weather conditions are where you live (maybe don't get a super sheer fabric if you have tons of rain and crazy wind all the time). I found a big wide bolt of fabric that was on major sale, so that's what I chose to use for mine. First you'll need to measure how tall your pergola structure is to determine how long to make the curtains (I measured from the ground to the middle of the horizontal boards I was hanging them from). I found out that the four corners of my pergola are all different heights so I had to make different lengths to fit each spot. Once you have your measurement, add 2" to the top and 2" to the bottom to allow for your top and bottom hem. The width of your curtain is up to you, depending on the fabric you choose and the size of your space. My fabric was already a good size at 54" wide, so I just finished the side edges and left it at that.

Once you have your final measurements (with your 4" added for top and bottom hem), you can cut each of your eight curtain panel pieces to size. On each panel, fold the top and bottom hem over 1" and pin in place. Press your seams flat with an iron. Fold the hems in again another 1", pin, and press again with your iron. Once your bottom seams are double folded and pressed, this is the point when you can slip your lead drapery weights into the bottom hem if you want to weigh the curtains down and cut back on how much they blow around. I used four lead weights per curtain, but you could also use galvanized washers or some other piece of heavy metal in the hem; just make sure it's a coated outdoor metal so it doesn't rust (lead doesn't rust, so that's why I chose the lead weights). After your hems are pinned and your weights are inserted, you can sew the hems closed with your sewing machine. I chose to use a serger and do a rolled hem for an easy finish for the sides of my curtains, but if you don't have access to a serger, you can just repeat the same hem process you did for the top/bottom hems on the sides as well (just cut down each hem fold from 1" to 1/2" so the sides don't look bulky).

Before inserting the grommets through the top hem, mark with a pencil how far apart you want each grommet to be. Mine have one placed at each end of the panel and then three more about 13" apart in between (so there are five total across each panel). Cut a small "x" with fabric scissors at each mark and follow the directions on your grommet kit to place a grommet at each spot. You'll be hanging your curtains in each of the corners of your pergola, so decide how far out you want your curtains to hang. I wanted the curtains to add a cozy feeling to the space, but I didn't want to obstruct the entire view of the yard, so I chose to bring the curtains out about 35" from each pole. Since I have five grommets per panel, I measured out 35" from the pole and evenly spaced out five marks for each of my cup hooks. Use a drill bit that is slightly smaller than the screw end on your cup hook, and drill a starter hole at each of your marked spots. Screw a cup hook into each of your starter holes, and repeat the process on the other side of the pole and then again at each of the other three pergola corners (you should have 40 hooks overall if using five hooks per panel).

Once your hooks are up, hang your curtains on the grommets, spray the waterproofing spray on each side of the panels, and allow the panels to dry. Now we need to make curtain tiebacks to keep the panels pulled back. Measure the halfway point of your four pergola corner posts, and mark that spot on the two sides of the poles that face the curtain panels. Drill a starter hole slightly smaller than your safety cup hooks, and screw a hook into each hole and repeat at each corner (you should have eight of these overall). Cut eight pieces of chain that are 28" long, and hook the chain into the safety cup hook and around your fabric to hold your panels in place. You can also use rope or make a fabric tie out of the same material as the curtains, but I like the look of the white chain, so that's what I chose. The curtains turned out even better than I imagined, and I love the lightness that they add to the space. It definitely feels more secluded (and super cozy) when sitting inside the pergola, and I have to admit that it does make me feel a bit like I'm on vacation in my own backyard—yes!