Diy Pallet Mirror Frame

A box of craft sticks (or popsicle sticks) has always been a gold mine for boredom busting craft ideas. They are like little wood building blocks waiting to be reimagined or put to use in so many ways. My daughter and I have been crafting with craft sticks since she was young. I love that you can buy a box of 1000 craft sticks for less than $5! Pair that with some glue and paint markers, and you have an instant craft like today’s DIY. My girl and I made these super cute wood frames that were perfect to showcase some of my favorite Instagram picts. Once we started, we couldn’t stop! They were so easy to make and so fun to decorate! Here is a quick video to show you how easy they were to make: Once you made the overall frame base, then the rest was building it up with more craft sticks to make the frame. When using regular-sized craft sticks, 11 sticks laid next to each other in a row makes the perfect square, and equals the length of one craft stick. So once you lay 11 sticks next to each other one way, you can secure with two more sticks going the opposite direction (at a 90 angle) with a little glue.

I used this same technique recently when I made the homemade Tic Tac Toe Board. But for this craft idea, instead of gluing each craft stick panel together, we built them up on the side to create a frame. Each craft stick platform made the perfect base for a mini photo or mirror frame. The best part is that you can decorate as you please. We used Elmer’s Painters, but you could also embellish with jewels or paint them with craft paint. Add a ribbon on the back as a hanger, or you could glue a magnet on the back to make a fun refrigerator or locker frame. I love how they turned out! These make great gift ideas for Mom or Dad, or grandparents. Or really fun wall decorations. If you like crafting with sticks, check out this Homemade Tic Tac Toe Board Have you ever created a Popsicle stick reaction? Check out more about it here. Garden Gnome Craft Sticks for your gardenSubscribe for access to The Vault Get immediate access to FREE printable decorating cheatsheets.

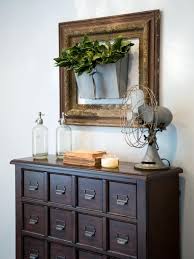
Stuffed away in a corner of our spare room was a purchase that we made when buying our first home (so around 9 years ago!) like most i love an Ikea visit and during one of these visits we purchased a HUGE mirror, the actual mirror of this size is no longer available (boo) but you can see the smaller version HERE. At the time i loved the mirror... now, not so much love. We kept it mostly as we did not have another full length mirror in our home. So it got stowed away in a corner of our guest bedroom, it was useful to have but... it wasn't loved and i didn't like it. [Apologies in advance for the photos below, we had to try and assemble this HUGE frame inside as it was pooring with rain, so the best was made with the space available - they should give you the general idea though :)] This time we opted for the reclaimed wood 'look' due to the size and weight of the mirror (and frame) we opted for the lightest weight wood as possible which unfortunately ruled out our reclaimed wood stock pile (boo!) we purchased our wood at a local hardware store and used a combination of dark oak wood stain and grey paint.

This was then sanded off once dry to create the wooden look required. Some areas had a second coat/extra sanding for effect. Inspire Me Please | The DIY Party | Made it Love it | The 36th Avenue | Keeping It Simple Crafts | Nifty Thrifty Things | The Casual Craftlete | Chic On A Shoestring | Bewitch Me & Titi Party | Its So Very Cheri | Skip To My Lou | Mod Vintage Life | Miss Mustard Seed | be different act normal | Just us Four |
Rent To Own Laptop With Bad CreditThe Pin Junkie |
All Terrain Tires For 24 Inch RimsKitchen Fun with My 3 Sons |
Discount Prom Dresses Long IslandLiving Better Together | Mommy on Demand | From my Front Porch to Yours | All Things with Purpose |

A Delightsome Life | White Lights on Wednesday | Table for Seven | My Girlish Whims | Sweet Silly Sara | Ginger Snap Crafts | The DIY Dreamer | The Life of Jennifer Dawn | Ducks 'n a Row | A Pinch of Joy | Cupcakes & Crinoline | Sugar Bee Crafts | A Stroll through Life | My Uncommon Slice of Suburbia | Our Home Away from Home | Nap Time Creations | Designed by BH | Home Decor & Frames Mirrors & Wall Decor Published on January 5th, 2015 | What’s the most common form of wood that ends up in dumpsters? Shipping pallets – according to the EPA, they represent 90% of wood packaging waste. Dumpster divers can likely confirm this, as can anyone who’s ever worked in a manufacturing setting: many years ago when I worked an assembly line at a door factory, we often got sent out to disassemble pallets for the dumpster. But as we’ve demonstrated before, waste wood isn’t bad wood, and there are lots of ideas out there for putting this waste to good use.

Since distressed wood furniture is kind of cool these days, DIY pallet furniture won’t just save you some money; you could probably make some if you’re so inclined… or, at least, create a stylish look for your own living space. And there are always wooden pallets available for the taking: if you don’t want to just go out and take them from the backs of commercial buildings, you can get in touch with retailers, manufacturers, or any company/non-profit that has large amounts of materials shipped in to see if they’ll let you have them. Keep in mind that these organizations are paying to have them dumped; you’re saving them a little money by taking them off of their hands. Not all pallets are the same! Pallet manufacturers use different kinds of wood, and different kinds of treatments to preserve it. Some of those treatments are toxic, so you’ll want to avoid those. This post at Instructables provides the information you’ll need to make sure the pallets you gather are safe.
Pallets aren’t generally made from the highest quality wood, so breaking them down often means breaking some boards. A number of the projects below discuss the best ways to do this; from what I’ve seen from the palletsphere, separating boards with a sawzall/reciprocating saw works much better than prying them apart. Since pallet projects are hot, a lot of sites have sprung up around the topic. Most of them are pretty useless, and only feature photos (often cribbed from other sites). From my own searching, I’ve found that the best places to find actual tutorials/instructions for DIY pallet furniture are Instructables (surprise, surprise), reddit’s Pallet Furniture subreddit (which you do have to dig through – lots of posts there are also just pictures… but pictures of projects the original poster actually created), and Youtube (of course, quality varies here). Don’t want to dig yourself? Here are nine good tutorials I found (at the sites mentioned above). 1. Adirondack Chairs: Pallets are great for outdoor furniture, and jkratman at Instructables breaks down this project very nicely (including lots of good information about working with pallets in general at the beginning).

2. Loft Bed: This space-saving bed also requires some 2x4s (likely for sturdiness). The end product looks great, and imgur user nosikcut has done a very nice job breaking the process down into understandable steps. 3. Wine Rack: A gorgeous and functional accent piece that also looks like a good starting project if you’re new to the whole woodworking thing. 4. Coffee Table #1: Yep, lots of coffee table projects out there… but a lot of them look really nice! This one from PBS’ New Yankee Workshop takes five pallets… 5. Minibar: This one also looks fairly simple, but leads to a unique piece for your entertaining space (or creates it if you don’t have it!). 6. Desk with Computer Shelf: Unless you’re an all-laptop household (like mine), you’ll want a convenient space to put that desktop tower. This plan from Instructables works that in. 7. Patio Sofa: Another piece of outdoor furniture that looks really easy to make – you don’t have to break down most of the pallets!