How To Install A Toilet On Tile Floor Video

When sitting on new tiles, the toilet may not contact the existing flange. When you tile your bathroom floor, the combined thicknesses of the tiles and backer board can raise the floor as much as an inch or more above the closet flange. You can't compensate for this much of a height difference with a thicker wax ring, so you'll probably need to raise the flange before you put the toilet back. It's not as difficult a job as it sounds, and doesn't involve cutting out the old flange and putting in a new one. You only need to install a flange extender on top of the existing flange. Measure the distance from the surface of the flange to the surface of the floor, using a ruler. Purchase a flange extender with a thickness equal to, or 1/16 inch less than, that distance. Extenders are plastic rings that sit on top of the existing flange ring. They come in various thicknesses, and you may need two of them to obtain the necessary thickness. Remove the screws holding the existing flange to the floor and discard them.

Replace them with screws that are the same gauge, but 1 to 1 1/2 inches longer. Place the flange extender on top of the flange and align the holes in the extender with those of the flange. Drive a new screw into each hole and tighten it securely. Make sure the surface of the extender is flush with the floor or less than 1/4 inch above or below it. Hook the heads of a pair of new toilet bolts under the tracks on either side of the extended flange and slide them toward the middle of the tracks.
Ebay Uk Chair Back CoversDon't reuse the old bolts as they are probably too short.
Dog Bath Tub IdeasRemove any old wax from the waste outlet underneath the toilet bowl and push a new wax ring into the outlet.
Plastic Mirror Tiles For CraftsThe tapered end of the ring should face the toilet.

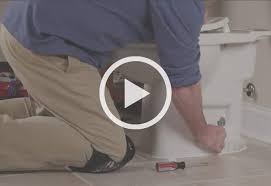
Lift the bowl over the flange, guide the bolts through the holes on the bottom and set it down. Push down on the bowl to compress the wax ring. Slide a washer and plastic cap holder onto each bolt and screw on a nut. Tighten the nuts with a wrench, holding the bolts with pliers to keep them from turning, if necessary. Tighten one nut a few turns, then the other. Continue in this way until the toilet is secure. When you're done, cut each bolt with a hacksaw so that about 1 inch of thread extends beyond the nut, then snap a plastic cap onto the cap holder. Caulk around the base of the bowl with silicone caulk. Use clear caulk or one with a color that matches the toilet or the tiles. Things You Will Need Ruler Flange extender Screwdriver 3 or 4 flange screws 2 toilet bolts Wax ring Washers Cap holders Hacksaw Caps Silicone caulk Tip References Handy Owner: How to Re-Install a Toilet Bowl on New Ceramic TilesRenovation Experts: How to Install a Toilet On a New Tile Floor Photo Credits Stockbyte/Stockbyte/Getty Images Suggest a Correction

How to Install a New Toilet Flange Curing a wobbly toilet—once and for all—with This Old House plumbing and heating expert Richard Trethewey In this video, This Old House plumbing and heating expert Richard Trethewey shows how to fix that wobbly toilet by replacing the toilet flange 1. Use a small sledgehammer and cold chisel to separate the old cast-iron closet flange from the toilet's drainpipe, known as the closet bend. 2. Pry free the loosened closet flange with a flat bar. 3. Set the new compression flange over toilet's drainpipe, and then trace around it with a marker. 4. Use a hammer and cold chisel to chop out any tile that's preventing the flange from sitting flat without wobbling. 5. Press the rubber gasket onto the new closet flange; be sure the gasket's tapered edge faces down. 6. Set the brass ring on top of the rubber gasket, and tap it down with the hammer. 7. Use a ratchet wrench to tighten the four stainless-steel screws that secure the flange to the floor.

8. Insert two new closet bolts into the slots in the closet flange. 9. Press a new wax ring tight to the flange. 10. Set the toilet on top of the flange, making sure the two closet bolts pass through the holes in the toilet's base. 11. Onto each closet bolt insert a white plastic base, brass washer and hex nut. 12. Alternately tighten each nut with a ratchet wrench, being very careful not to over-tighten them. 13. Trim the closet screws down to size with a close-quarter hacksaw, then snap on the plastic covers. 14. Reconnect the water-supply line to the toilet. 15. Turn on the water by opening the toilet's shut-off valve. 16. Allow the toilet to fill, then flush the toilet and check for leaks. 17. Grab each side of the toilet and try wiggling it. If necessary, very carefully tighten each closet bolt a little more. Tools List for Replacing a Toilet Flange Cold chisel, used to crack free the old cast-iron closet flange Flat bar, for prying up the old closet flange

Black marker, used to trace around the new closet flange Ratchet wrench and assorted sockets, for tightening nuts Close-quarter hacksaw, for trimming the closet bolts down to size 1. Compression flange, used to replace the old cast-iron flange 2. Wax ring, for sealing the toilet to the flangeHow to Tile a Bathroom Floor Installing a new mosaic-tile floor with contractor Angelo McRae In this video, contractor Angelo McRae installs a new mosaic-tile floor. 1. Plan the tile layout based on the size of the tile and the position of a primary element, such as the tub or vanity. 2. Snap a chalk line onto the floor to establish the starting point of the tile. 3. Mix fortified thin-set mortar with water in a bucket using an electric drill and mixing paddle. 4. Apply the mortar to the subfloor using a ¼-inch x ¼-inch notched trowel. Spread the mortar along the chalk line, but don't obscure the line. 5. Set the first sheet of mosaic tiles into the mortar, flush with the chalk line.
6. Lightly press down the tile using a rubber float. 7. Continue to spread mortar and set tiles across the floor. Be sure to maintain consistent joints between the tile sheets. 8. When it's necessary to fit the tiles around an obstacle, such as a toilet flange, use a utility knife to slice through the backing mesh, then remove the individual mosaic tiles from the sheet. 9. Use a wet saw to cut the mosaic-tile sheets to fit along the wall. 10. Mix up more thin-set mortar, when necessary, and set the last tile sheets into place. 11. Allow the mortar to cure overnight, then mix water and tile grout in a bucket using a margin trowel. 12. Spread the grout across the floor using a rubber float. Be sure to force the grout down into all the spaces between the tiles. 13. Wait an hour or two for the grout to set up (partially harden), then wipe off the excess grout with a damp sponge. 14. Allow the grout to cure for three or four hours, then buff off any residual haze with a soft, dry cloth.