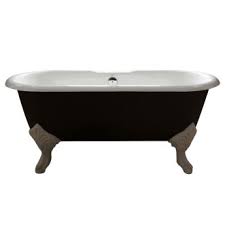
Is My Bathtub Steel Or Cast Iron

An affordable alternative to expensive walk-in tubs! The Easy Step Bathroom Safety Package begins with the installation of a Easy Step walk through bathtub cut out into your existing bathtub. The 24” wide by 9” deep tub cut converts your existing tub into a shower making it safer to step through instead of over the side of the tub. It can be installed in less than a day, and often in the same week. Call 888-271-7690 to reach the office nearest you or Find a Location. Designed to reduce the danger of slipping and falling when getting into and out of a bathtub, our bathroom safety package provides the necessary items to create a safe home bathroom environment for seniors and the mobility impaired. Installed by certified technicians. According to the National Council on Aging, one in three slip and fall accidents for adults 65+ happen in the bathroom, usually resulting in a serious injury. The Easy Step Bathroom Safety Package is an affordable solution for senior homeowners.
It allows seniors and the mobility impaired to stay in their own homes longer. Walk-in tubs typically require large amounts of time and money to tear out the old bathtub, remove walls, and perform extensive plumbing modifications. The CleanCut Door Option gives you the same safety, convenience and independence benefits for thousands less than expensive walk-in tubs. Plus our one-day installation in your existing steel, cast iron or fiberglass tub, saves you the headaches of the time and mess the installation of a walk-in tub requires. An estimate for an Easy Step Package also does not require the high-pressure sales presentation most walk-in tub or door tub sales people demand. Miracle Method will provice a free estimate and respond quickly to schedule the installation. To learn more about how Miracle Method can make your bathroom safer, or safer for someone you care for, click on Find a Location or call our toll free locator number, 1-888-271-7690 to reach the nearest Miracle Method professional.

High-quality bathtubs—and a variety of other plumbing fixtures—have surfaces made of porcelain (or “vitreous”) enamel. This enamel is the result of fusing powdered glass onto a base or metal, glass, or tile at a very high temperature—typically 750 to 850 degrees C.
Van Curtains For SaleAs the glass powder melts, it flows evenly across the surface, eventually cooling to form a very hard, smooth, durable finish that can be plain white or brilliantly colorful.
Savannah Cats Pets For SaleThis type of finish is used on products ranging from bathtubs and sinks to appliances and tile.
Vertical Blinds One Not Turning When cleaning a porcelain enamel surface, it’s important to keep in mind that the material is extremely hard, but still can be chipped by hard blows, or damaged by harsh abrasives and long-term use of acids.

Small chips and dings can be repaired with an inexpensive porcelain touch-up solution, available online and at home-improvement centers (be sure to choose the color that is a perfect match). Wash porcelain with a dilute mixture of warm water and detergent. A pasty solution of warm water with baking soda will help remove dirt and soap scum. Commercial bathroom or surface cleaners also can be used. Chlorine or hydrogen peroxide bleach works well at removing tough stains. Always dilute them before using, and rinse them off after a few seconds of use. Bleaches won’t work on removing rust. Be sure to wear gloves. You can remove heavy deposits of dirt, grease, or soap scum with a solution of 1 tablespoon of a TSP (trisodium phosphate) substitute mixed with 1 gallon of hot water. Do not combine this with other cleaners. Most scouring powders have hard, sharp particles that make tiny scratches in the surface. These scratches will catch dirt, grease, hard water deposits, and soap residue.

Then more abrasives are needed to remove these imbedded soils. Avoid using scouring powders, but if you must use an abrasive to remove a particularly stubborn stain, use the finest scouring powder you can find. Acetic and muriatic acids can be used to remove some stains, but they can slowly disintegrate the surface coating of porcelain enamel, eventually attacking its metallic base. If you use an acid, be sure to wear rubber gloves. After cleaning with any of these methods, always rinse the surface thoroughly with clean water. NEXT SEE: Repairing Bathtub Surfaces Featured Resource: Find a Local Bathtub Resurfacing Pro I love the period details in my Victorian apartment, but I don’t need a discolored, chipped bathtub to remind me of the history of the place. (I have sloping floors and drafty windows for that.) A few weeks ago, I was batting around some small remodeling projects with a friend who was staying with me. I wondered aloud about refinishing my bathtub, and she quickly chimed in: “Yes, that would be good!”

Hint taken–and in anticipation of more guests soon arriving for the holidays–I got to work. Here’s a look at my project, followed by instructions, should you, too, be feeling ambitious. Word of warning: This project is not for the faint of heart. It takes a full day of work, plus three days to dry. The refinishing fumes are toxic, and you’ll need to wear a respirator mask. And though the tub looks 95 percent better after my labor, it still isn’t perfect. I would only recommend refinishing your bathtub yourself if at least two of the following three apply to you: You’re at least a little bit handy–let’s say you have a strong painting resume. You’re extremely patient, or at least refuse to give up. You’re someone like me who hates not knowing how to do things and won’t be satisfied until you’ve tried. Does this describe you? Photography by Liesa Johannssen. Above: The fruit of my labor: A refinished tub with new caulk and accoutrements for houseguests.

Photography shot with the Canon EOS 70D digital SLR camera, with Dual Pixel AF technology and built-in Wi-Fi. Step One: Make plans to shower somewhere else for three days. You’ll absolutely want (and need) to shower after completing this task, and the epoxy has to cure for 72 hours. Lucky for me, I have nice neighbors. Step Two: If your existing caulk is worn, strip it. Mine was moldy and looked if it had been applied by someone with his eyes closed. I first used a chemical caulk remover to soften the existing caulk and within seconds, I got some in my eye. It was an early reminder to wear goggles; the chemicals in this project only get worse. Once I could see again, I removed most of the caulk with an ingenious little Caulk-Away tool, and scraped off remaining residue with a sharp Putty Knife. Step Three: If you have chips and cracks in your tub as I did, you’ll want to apply chip repair before you get started. Step Four: Clean the tub. Mine not only had heavy evidence of the showers of tenants past, but was full of paint splatters and stray globs of caulk from sloppy maintenance jobs.

I scraped everything off with a plastic putty knife, then followed the bathtub refinishing kit’s directions to wash, dry, sand, repeat. It’s critical to do a good job or the epoxy won’t adhere. This is where the bulk of your time will go today. Step Five: Prepare the bathroom for Armageddon. Mask off anything you don’t want covered in tiny white flecks. (In reviews, some commenters were surprised by how far the epoxy traveled, so I heeded their warnings and covered everything. Turns out it was overkill; if you’ve spray painted something before, expect the same amount of overspray.) Step Six: Lock up the men, kids, and pets, open the windows, and turn on the fan. Make sure your space is well-ventilated. The refinishing fumes are strong and you’re going to need a respirator. I can’t sing the praises of mine enough; I truly didn’t know what the epoxy smelled like until I left the bathroom and took the mask off, it worked that well. Don’t forget chemical goggles and gloves.

Step Seven: Follow the directions that come with the kit and spray paint the bathtub. Rest assured, once you’ve prepped, this is the easy part. If you get any epoxy drips from spraying too heavily, dab them away with a sponge. I was glad to discover that the toxic smell didn’t linger for long. I don’t have any direct ventilation in my bathroom, but with a standing fan blowing air out three open windows in the next room, all chemical odor was gone within 90 minutes. Step Eight: Use Lacquer Thinner to clean up any errant epoxy, and wait 72 hours for the finish to cure. Once it’s dry, re-caulk the tub if you removed your old caulk. Thoroughly wash the surface so the silicone will adhere and pass over it with rubbing alcohol. I used GE White Kitchen and Bath Caulk, which is shower-ready in three hours; $6.24 at The Home Depot. Above: The “before” bath was scratched, discolored, and surrounded by moldy caulk. Here, I’m midway through the process of removing the old grout.