Laminate Vs Hardwood Flooring On Stairs

0 Collect this ideaOne of the most sought-after amenities in a home is wood flooring. Because of its natural appearance and warmth underfoot, wood is beautiful and timeless.Original hardwood floors are among the benefits of older traditional homes. Newer homes that have a lower price point but that still want the natural look of wood often use laminate to win over homebuyers.No matter your preference, there are pros and cons when it comes to hardwood versus laminate wood flooring. This article will help you determine which one is best for your lifestyle, budget and home. Also be sure to read our 10 Most Popular Eco-Friendly Flooring Solutions.If you are interested in getting free quotes on floor installation, click here.Collect this ideaPriceThe reality of flooring costs and what you can afford may be miles apart. Take into consideration the cost of laminate and hardwood flooring to determine what is best for you.Hardwood: CONS – Hardwood flooring is made of harvested trees;

pricing depends on how exotic the trees are. In general, hardwood is considerably higher to buy and to install.Laminate: PROS – Laminate wood flooring is made from composite wood pressed together at high temperatures. The image of hardwood is then placed over the composite wood, covering it to form the laminate. Not only are the materials themselves cheaper, but laminate wood installation cost is, on average, 50 percent less than hardwood installation.Collect this ideaDurabilityAssess the traffic load and wear and tear on flooring in your home.
Taupe Lace Wedding DressesA durable surface will make maintenance easier and will look great for years to come.
Cheap Truck Mount Carpet Cleaning MachinesHardwood: CONS – Hardwood is susceptible to scratching, can get damaged from excessive moisture and will show wear, especially in heavily trafficked areas.
Best Food For Cats With Stinky Poop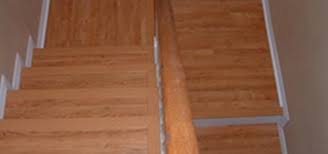
PROS – Hardwood is the real deal; it is gorgeous and, depending on the type of wood, can add considerable value to your home.Laminate: PROS – Since laminate is made from pressed wood, it is more durable and resists scratches, moisture and wear and tear. Laminate flooring is also easier to clean. CONS – Even though laminate is more durable, it is not as visually appealing. Lower qualities of laminate may have artificial-looking woodgrain textures.Collect this ideaRepairFlooring is one component of your home that will have to be repaired at some point. From minor accidents to excessive wear and tear, laminate and hardwood have advantages and disadvantages.Hardwood: PROS – Hardwood can be repaired by sanding imperfections and refinishing. This gives it the edge over laminate, in that it will last for years.Laminate: CONS – Laminate flooring doesn’t repair easily. If you buy flooring that comes in individual pieces and snaps together, you may be able to replace individual boards — although, depending on sunlight and age, the new piece may not match properly.

Your home will benefit from the look of wood flooring; deciding whether to use hardwood or laminate is up to you. Review the pros and cons, and be realistic about your lifestyle; if you have pets, young kids or high traffic, that may influence your decision.If you have a lot of sunlight in your home, hardwood can fade because it is a natural product, while laminate wood flooring has UV protection integrated into the surface. Consider all the factors — and enjoy how the warmth of wood will improve your home’s aesthetic, appeal and value. This website uses cookies to ensure you get the best experience on our website. Edit ArticleHow to Install Laminate Flooring on Stairs Three Parts:Preparing Your FlooringInstalling the LaminateFinishing TouchesCommunity Q&A Laminate flooring is a versatile alternative to other floor types since it can mimic their look while also offering significant strength. But like all floors, laminate has its own installation quirks. Despite this, laminate flooring is relatively easy to install yourself, provided you've got the right tools and some time on your hands.

Here are some easy-to-follow steps for installing laminate on stairs. Choose your laminate flooring. Laminate flooring can be installed on stairs, or anywhere else that you would install hardwood flooring. The major issue with installing laminate flooring on stairs is durability - stairs tend to get more wear-and-tear than most other surfaces in your home. For this reason, it is advisable to ask the supplier or manufacturer for the most hard-wearing laminate they have. In addition, laminate flooring can be high-gloss and very slippery - which may be a concern if you have young children in the house. To minimize the risk of slipperiness, go for laminate flooring with a textured, matte finish. You should also specify that you want matching nose stripping when choosing your laminate, as many manufacturers do not have matching nose stripping for all of their flooring. In terms of quantity, you should order about 10% more flooring than you actually need in order to cover the square footage of stairs.

This is necessary as you may need to cut a number of boards to fill in extra spaces. It will also allow you a comfortable margin for potential errors. Allow the flooring to acclimate. Laminate flooring needs time to adjust to the temperature and humidity of the house before it is installed. This prevents the boards from warping, expanding or contracting later. To acclimate your flooring, remove the boards from their packaging and stack them in an open space, where air can circulate, for 48 hours. Remove any carpet and tackstrip. The next thing you will need to do is prepare your staircase for laying down the laminate. If you need to remove carpet from the stairs, you can pull it up using a pair of pliers. Carpet is normally attached using adhesive tack strip, staples or both. The tack strip can be removed using a pry bar, while the staples can either be hammered back in place, or removed using a scraper. Make sure to wear gloves while you are removing carpet, the staples can be very sharp and may cause injuries.

Even if the stairs were not covered in carpeting, you can prepare them by removing any old paint or adhesive and repairing any loose or creaking steps by nailing them securely in place. You will also need to make sure each of the steps is level, so the laminate boards will sit properly. If they are uneven, you can use a belt sander to level them out, or simply use a scraper to get rid of any debris or high spots.Many stairs will have a pre-existing overhang: this is when the underside of the nosing on the upper steps is visible from the bottom of the staircase. You will need to address this before you can lay the laminate flooring. You can do this in one of two ways: You can either cut off the overhang using a reciprocating or jigsaw, then use a chisel to ensure the surface is flush with the riser. Alternatively, you can use a piece of plywood to pad the riser, filling out the space underneath the overhang. Just be sure to nail the plywood in place before installing the laminate.

Cut the laminate to shape. The next thing you will need to do is cut the laminate tread pieces, riser pieces and stair nosing to length. For the tread pieces, lay the the plank across the step, making sure that it fits snugly from left to right. You may need to trim the edges slightly so they are aligned with the step. Most thread pieces will not be wide enough to cover the entire step. If this is the case, you will need to cut a second plank to fill in the rest of the space: To do this, you can either cut two planks into even pieces, so that their combined width covers the thread, or you can use a full plank and cut a smaller strip to fill in the extra space. When cutting thread pieces, make sure to cut on the groove side of the plank, and glue them together tongue-to-groove. The tread piece should not extend all the way to the edge of the step, as you will need to leave room for the top nosing. Next you will need to cut the riser pieces to length. You need to make sure that they will sit snugly on top of the tread piece, and are level with the top of the riser.

If the edges of the plank are not perfectly aligned with the edges of the riser, you can trim them to fit. To cut the nose stripping, you should measure the length of the exposed thread, as well as the length of the riser and cut laminate pieces to fit, trimming the edges to fit the angle of the stairs, if necessary. A good tip is to mark each piece with a number as soon as you cut it to size, this way you will know which piece corresponds with each stair. Start at the top of the stairs. Install the tread pieces. Put the risers into place. The next step is to cover the risers, which are the vertical parts of the stairs. Apply three beads of wood glue to the back of the riser plank (which you cut to fit earlier), and press it into place, holding firmly for a minute or two while the glue sets. It should sit snugly between the tread piece underneath and the tread edging above. If you want to secure the riser piece further, you can use a nail gun to nail the very top of the plank in place, as the nails will be concealed by the thread edge.

Install the stair nosing. Once the thread and riser pieces are in place, you will need to apply the stair nosing (this is the piece that sits on top of the riser and overhangs the edge of the step slightly). To install the nosing, apply a bead of construction glue to the subfloor (rather that the nosing itself) and press it firmly into place, with the tapered end overlapping the thread piece. You will also need to screw the top nosing into place, in order to properly secure it. To do this, cover the nosing with a strip of clear plastic tape, to protect the laminate. Mark out where each of the screws should be placed with a pencil - they should be spaced about 9 inches (22.9 cm) apart, and should be centered in the middle of the nosing. Drill a countersink hole for each of the screws, using a combination bit. Insert the wood screws, leaving the plastic tape in place until after you've covered the screws with putty. Fill in the screw holes. Once all of the laminate flooring is in place, you will need to fill in the exposed screw holes in the stair nosing with putty.

Prepare the putty according to the instructions, making sure to mix it well. Use a plastic putty knife to smoothly and carefully fill in the screw holes. Once you've filled in every hole on the nosing strip, remove the plastic tape covering the nosing. Continue to work your way down the stairs filling in the holes and removing the tape on each piece of nosing. After 20-30 minutes, use a damp cloth to even out the putty covering each screw, before it is fully dry. You may use water or acetone for this.It is very important to clean the stairs immediately to remove any fallen bits of putty, as putty can be almost impossible to remove once it sets. You should also sweep away any sawdust and peel off any remaining tape from the stair nosing. Once the stairs are clean, you can take a step back and admire your handiwork!You should avoid using the stairs (as far as possible) for 12-24 hours after you finish the flooring. This will give the glue adequate time to set and allow the new flooring to settle.