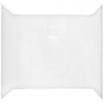
Mobile Home Bathtub Wall Surround
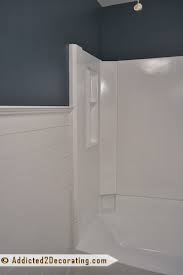
Select Products on the right to view prices and SizesSelected Tubs and Surrounds are available in a high gloss/high impact acrylic finish called PERMALUX. Hard as a rock and stain resistant the Permalux Polymer Alloy also resists chipping, peeling or spider webs and comes with a 5 YEAR GUARANTEE! We purchased a 15 yr old mfd. home. Master bath has an ABS(?) bathtub with separate shower walls. It's serviceable, but will eventually need to be replaced(ugly). A: I would like an all in one insert tub with walls. I can see, without measuring, the walls are not square. Is an insert possible without a lot of finagling? We're on a limited budget. B:If I cannot do an all in one insert, what r my best options for material for the tub and the separate walls. The shower walls right now are board with vinyl over them, doomed to fail. Again, not looking for Top of the line, something economical, easy, sturdy, easy to clean. I have replaced dozens of older tub/shower units with nice fiberglass tubs with a three piece matching/interlocking surround wall kits.

Since getting a one piece unit into old construction is usually impossible, these modular units work well. The better units are sturdy and will adapt well in situations where the walls are not perfect. Since the wall units interlock and overlap the tub flange, leaking is rarely a problem. The costs of these units run from about $500 to $800. I have good results with Kohler and American Standard units. Avoid the cheap units that have non-locking wall sides and require a lot of sealants and flimsy corner trims. This is not an easy DIY project for someone without experience. The process will include plumbing skills, leveling the tub unit and shimming the walls if the existing wall framing is really bad. Sometimes it is necessary to remove existing wall sheathing (drywall etc) and attach tub and sides to studs, then use moisture/mold resist drywall to recover the walls. Are you sure you can install a one-piece unit? Measure your doorway and hallway clearance. Often the one-piece units are installed during initial construction before the doors and drywall are installed.

You may not have enough clearance to get one in. As Shirlock & Grunthos say, you're probably not going to be able to do a one-peice (unless you cut a large hole in the wall.)
Silver Lab Puppies RescueI did a tub and surround a few years back, tried a budget plastic surround, got it home, pulled it out of the box, put it back in the box, returned it and upgraded to a (3 peice) fiberglass surround that cost a bit more than the new tub - the cheap was was clearly too thin to actually last (or possibly even survive the install.)
Ice Age CurtainsThis was a limited project to get the house sold.
Best Way To Clean Pool Table ClothI figured I would not want to buy a house with the cheap plastic surround, so who else would? Might as well leave the rusty leaking steel tub I was replacing in as use that piece of junk.

To make the most of DIY in a project where it's not just to make the bath look good enough to sell the house, I'd consider tiling it rather than even a "good" fiberglass surround. More DIY mileage and a nicer end product - potentially at less cost. If that sounds scary, try a few smaller tiling projects first - it's less daunting when you have done some (or you'll find out it's not your idea of a fun time on a smaller project.) If you use a fiberglass (or other plastic) tub, bed the thing in plaster - it should be in the instructions, if not, well, find some elsewhere. It makes a world of difference in how the tub feels and holds up over time. Literally as simple as placing a pile of plaster on the floor, and then setting the tub, so the plaster fills the space between the tub bottom and the floor, fully supporting it. Nothing wrong with a fiberglass tub if you attend to that detail and don't scratch it up - cast iron is "more solid" out of the box, but also expensive and heavy - the only end benefit (to an annoying install experience dealing with the heavy thing) is that you have a harder porcelain finish.

I personally won't use even "moisture resistant" drywall around a tub. Tile backer (durock, hardi-backer - stuff comes in 3x5 sheets, normally) is far more moisture resistant and does not cost a lot more for the small area - so if anyone ever decided they don't like the fiberglass surround in the house we sold, they'll find tile backer behind it. There's also framing to support grab bars if ever needed.Browse other questions tagged bathtub or ask your own question.As a general rule, replacing a bathtub is NOT considered a do-it-yourself project -- especially if your changing the type and size of the tub. Changing anything means refiguring the drainlines, vents and waterlines and that can get a bit tricky and frustrating. But if your old tub is cracked or damaged and you simply wish to replace it with the same kind, then the project becomes more manageable. Most bathtubs in mobile homes are plastic. When plastic cracks or breaks, it cannot be permanently repaired like fiberglass can.

If the crack isn't too bad, the best you can do is temporarily repair it by using one of two methods. First method is to purchase an epoxy repair kit. The biggest advantage of the epoxy kit is that the repair isn't as noticeable because the color somewhat matches the tub. The disadvantage is that it works best only on small cracks because any movement on big cracks can cause the crack to reappear. Second method to repair a cracked plastic bathtub is to apply a piece of quick fix tub repair tape to seal the crack. The advantage of the tape is that it will move with the tub so the crack will not reappear (unless the crack runs). The disadvantage is that it looks somewhat gaudy but by gosh it does work! If you've decided to replace your bathtub, besides the size and color you will also want to understand how and why the bottom of your tub is supported. Most plastic tubs are supported in two ways -- plastic legs or styrofoam. Pictured to the right is a tub supported by plastic legs.

If you have a sewer pipe running directly under the tub, then you will need this type of tub to make room for the pipes. The disadvantage of using a tub with legs is that the tub can creak if the subfloor under the tub isn't flat causing the legs to sit uneven. The legs have to installed into the bottom of the tub. When doing so, push them in straight or you'll risk breaking a tab that holds the legs in. This photo on the right shows a tub that uses styrofoam for support rather than plastic legs. The styrofoam sits directly onto the floor. Overall, the styrofoam offers better support with way less creaks. Obviously the disadvantage is that you can't run pipes directly under the tub. First shut off water to the bathtub. From underneath the tub, unscrew pipes from drain. This can be accomplished by either taking apart the p-trap (pictured right) or unscrewing the pipe directly from the tub drain itself. If your tub has an overflow, there will be another pipe going up the back of the tub to the overflow.
In this case simply take apart the p-trap and the rest will come out with the tub. Again, be sure the water is shut off to the tub. Next unscrew the waterline connections from the back of the faucet. Remove the nuts from the hot and cold nipples and slide the faucet out. Older faucets can be much more complicated to remove as the faucets themselves may have to be disassembled along with the spout and shower head. Once the faucet is removed, next step is to get rid of the old tub surround. If the old tub surround is held in place with plastic rivets (below), cut off the head with a knife or drill them out. Then with an utility knife, cut around the edge of the tub surround to loosen the caulk. Finally, grab a corner of the surround and carefully pull it off the wall. With the tub surround removed, the lip of the tub will be exposed. Remove all the screws from this lip. The old bathtub should now be loose and able to be lifted out and removed from the bathroom. Installed access door showing a peak at the main shut-off behind it.