Repair Leaking Tub Shower Faucet

You don't have to put up with the slow drip from a leaky faucet, nor with the growing stain it often leaves in the tub or shower. Fix it now and you'll prevent those headaches and save on you water bill too. The entire job, with special tools, may set you back a bit of cash, but doing it yourself is a lot cheaper than hiring a plumber, and usually much cheaper and easier than tearing out the old faucet and installing a new one. Worn rubber washers, seals or gaskets in the valve assembly cause most leaks. Here we'll show you how to fix a stem-type valve, which is common in older, two-handle faucets (separate hot and cold). We won't cover single-handle faucets here. By the DIY experts of The Family Handyman MagazineIt is not as difficult as it appears to repair a leaky three-handle tub and shower faucet. When you are tired of the leaks from a three-handle shower and tub faucet, do not bother to call the plumber, as this is a job most any handy person can easily do. As with all faucets, a three-handle faucet can develop leaks from regular wear and tear or just from age.

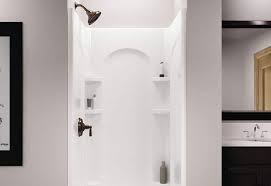
A three-handle tub and shower faucet use separate handles for the hot and cold water, and a handle in the middle to divert water flow from the tub faucet to the showerhead.
Best Acrylic Bathtub CleanerAlthough it looks complicated, you can repair a leaking three-handle tub and shower faucet in just a few steps.
72 In Bathroom Vanity TopsTurn off the water supply to the faucet.
No Sew T Shirt CardiganIf there are no shut-offs to isolate the faucet or the bathroom, turn off the main water valve for the house instead. After shutting off the flow of water, turn the hot and cold faucet handles to the open position to drain the faucet. Open another faucet on a lower level of the house or past the bathroom, to drain any remaining water from the lines.

Remove the screws from the hot and cold water handles. Gently pull the handles from the valve stems. Spray the handles with a lubricant if they appear to be a bit rusty and do not want to move. If the handles still stick to the stem, use a faucet handle puller to remove the handles without breaking them. Attach the puller to the handle and turn it until the handle frees up from the stem. Remove the escutcheon plate -- if it has one -- behind the handle by turning counterclockwise. If the plate contains a screw, loosen the screw and remove the escutcheon. Gently pry the escutcheon away from the wall with the flat-head screwdriver, taking care not to bend it if it is stuck against the wall. Insert a tub-and-shower valve socket wrench on the faucet stem and turn it counterclockwise. Remove the screw and rubber washer from the end of each valve stem. Add the new washer and tighten the screw. Inspect inside the valve with a flashlight. If the faucet seats are smooth, no repair is necessary.

If the seats appear worn or etched, replace them. Insert a seat wrench into each side of the valve and remove seats by turning counterclockwise. Replace with new seats and turn them clockwise to tighten. Reinstall the faucet stems by turning clockwise into the valve, tightening with a tub socket wrench. The stems should be snug but not overly tight. Reset and tighten the escutcheon plates and faucet handles. Turn on the water and test for leaks. Things You Will Need Phillips screwdriver Flat-head screwdriver Tub-and-shower valve socket wrench with rod Flashlight Spray lubricant Faucet handle puller Valve seat wrench Tips Warnings Photo Credits George Doyle & Ciaran Griffin/Stockbyte/Getty Images Suggest a CorrectionRepair a shower faucet that won't shut off. Most single-handle, cartridge-style faucets can be repaired in an hour or less with basic tools. Repair a shower faucet that won't shut off. Identifying a cartridge-style faucet In this article, we'll focus on fixing a cartridge-style faucet.
Cartridge valves have a single handle and operate when the cartridge slides in and out. Don't confuse them with single-handle ball-style faucets, which have a dome-shaped casing under the handle. We won't deal with two-handle faucets here, which may be either a stem-type valve or ceramic disc valve. Turn off the water at the fixture shutoff valves or at your home's main valve. Turn on a faucet to make sure it's off. Remove the handle as shown in Photos 1 and 2. If the handle sticks, try heating it with a hair dryer set on “hot”. If you still can't get it off, use a special handle puller—an inexpensive tool available from plumbing parts distributors or home centers. Virtually every faucet manufacturer has a different method of securing the cartridge to the faucet body. Look for a clip or spring and remove it (Photo 3). Cartridges are often difficult to pull out. Some manufacturers include a removal cap with new cartridges. Align the cap with the old cartridge ears and try to twist the cartridge loose.

Then pull it out with pliers. If you can't budge the old cartridge, you'll need a cartridge puller. Make sure the one you buy works on your brand of faucet. Look on the handle or trim for the faucet brand or manufacturer. A knowledgeable person at a plumbing parts store may be able to identify the brand and model from a photo. Review Photos 4 and 5 for instructions on using a cartridge puller. Make sure you twist the cartridge loose before pulling it out (Photo 4). Take the old cartridge with you to a plumbing parts store or a home center to find an exact replacement. Install the new cartridge Turn the hex screw by hand until it bottoms out. Snug up the hex nut by hand and tug on the cartridge puller handle. If the cartridge won't pull out, hold the puller handle steady and tighten the hex nut two full turns. Pull the cartridge out of the faucet body. Buy an identical replacement cartridge, align it properly and reassemble the parts.Disassembling a contemporary bath/shower faucet can be like solving a puzzle.

Bath and shower faucets come in a variety of attractive designs that carefully conceal the screw that holds on the handle. If the faucet is leaking, though, find that screw you must. Once you've accomplished this task and uncovered the valve, you'll find a cartridge, and your next challenge is to extract it so you can clean or replace it or replace worn washers and O-rings. If the faucet hasn't been serviced for a long time, this can be a formidable task requiring a special tool. If it comes out easily, though, the repair itself isn't complicated. Cut off the water to the faucet, either by turning off the main water shutoff valve for the house or one for the line that supplies the bathroom. Open the faucet to relieve water pressure before you disassemble it. Look for the set screw that holds the handle to the faucet stem. It may be behind the faucet lever or underneath it. If you can't see one, it must be under a cap, even if the cap isn't obvious. Look for a groove around the front of the faucet and work the tip of a flat-head screwdriver into that groove to pry off the cap.

Unscrew the screw that holds the handle with a Phillips screwdriver or an Allen wrench. Slip off the handle, then pull off the temperature-limiting disk, if there is one. Pull out the retaining pin that holds the cartridge with needle-nose pliers. Some cartridges are held by a collar that you can unscrew with adjustable pliers. Wrap a rag around the collar before unscrewing it to prevent damage to the finish. Grip the valve stem with pliers and pull the cartridge straight out. Be sure to note the orientation of the cartridge before you remove it so you can put it back the same way. It is designed for easy removal, but if it's old, the O-rings may have fused to the valve housing, and you may need a cartridge extractor to get it out. Work with an extractor recommended for your faucet by the manufacturer. Inspect the cartridge, and if it's full of mineral deposits, soak it overnight in white vinegar to dissolve them. The deposits can prevent the cartridge from sealing out water and may be responsible for the leaks.